Important: this post is a work-in-progress project. Last update: March 17, 2025.
Twitch has a steep learning curve, as does any kind of software that is used for streaming. With this post, I would like to help fellow streamers out by sharing my personal settings, tips, as well as tricks when it comes to broadcasting. As there is a lot to cover, not to mention the fact that I’m still learning, this post is still unfinished; I will do my best to update it as frequently as possible.
Table of Contents
My stream & output settings
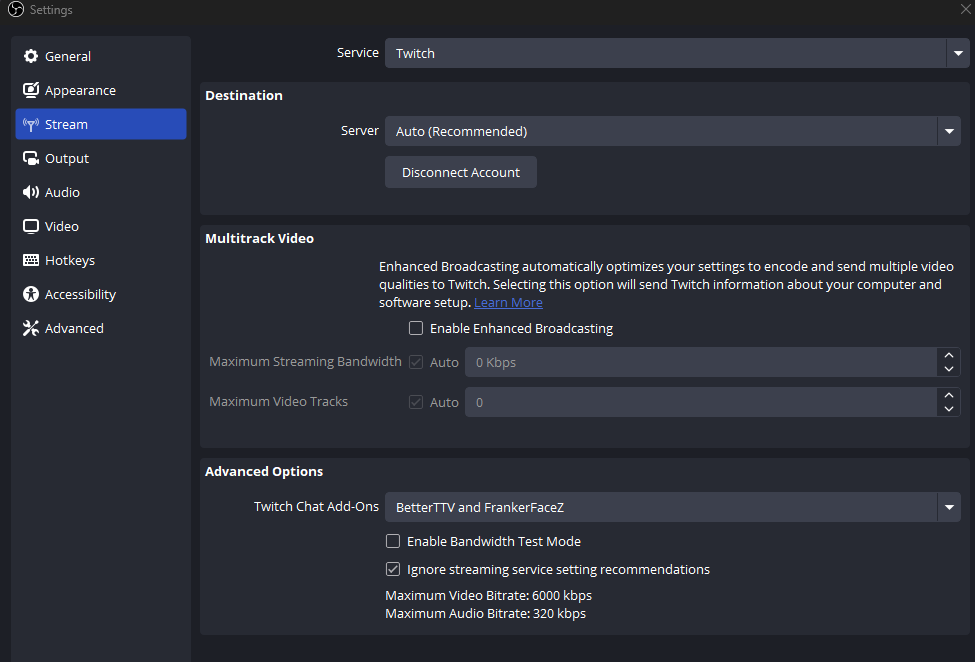
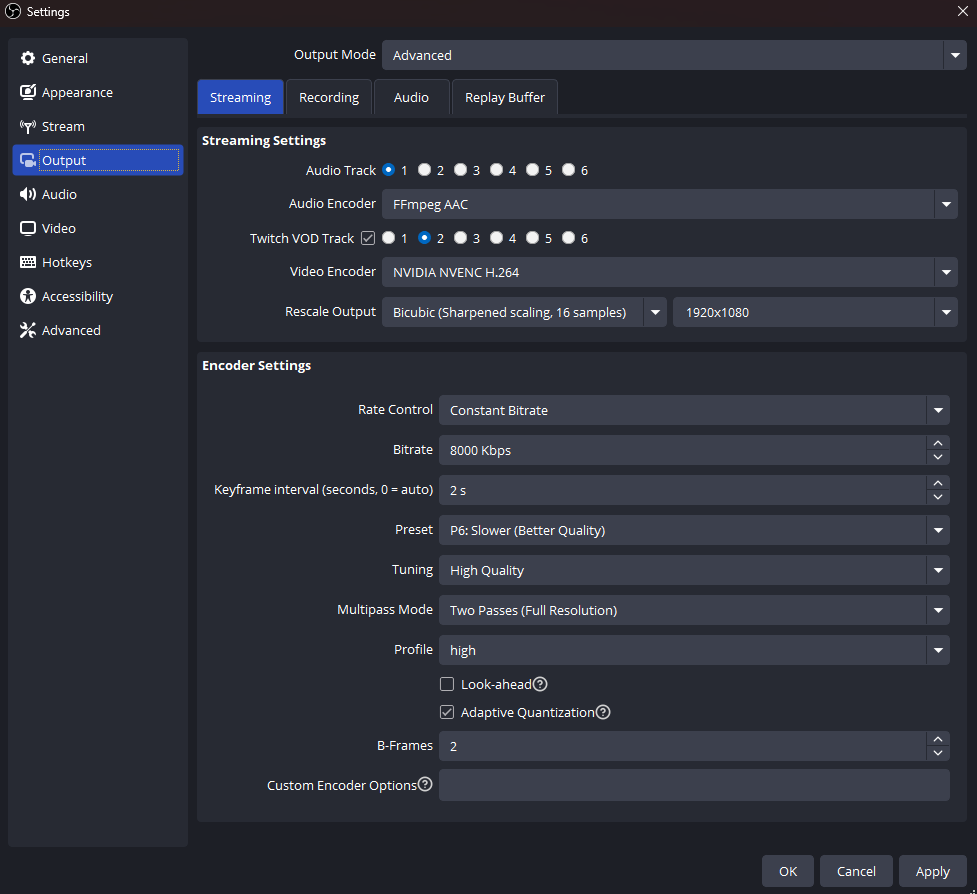
These settings are what I’ve found work best and look best for a high-movement video game like ESO.
If you’re an Affiliate, you do not have access to guaranteed transcoding, meaning that if a viewer’s internet is slow, they might not be able to watch high-quality streams (for example, 1080p60 at 6000 Kbps bitrate). Partners have access to this though, which means that their viewers are able to adjust the video quality whenever they’d like to.
Don’t forget to enable the Twitch VOD track setting if there’s audio going on in the background that you’d like to broadcast when you’re live, but you want it gone in your saved VOD’s. There are video guides for this on YouTube if you’re interested.
Because I have 1440p monitors, but Twitch doesn’t fully support 1440p streams yet, I downscale my footage to 1080p.
When it comes to the Preset setting, lower options seem to produce decent visuals too. This will depend on how much your GPU can handle. I could not see a difference between the P6 and the P7 presets. They look identical, so it’s best to just use P6 because of this.
Keep in mind that pixelation WILL happen if there’s a lot of movement in your footage (even if it’s just camera changes), regardless of what settings you decide to use.
My video settings

Because I use two 1440p monitors, and streaming in native 1440p is not a good idea (yet), I have to downscale my footage to 1080p. But my actual canvas (what I have on the screen) is in 1440p, as you can see here.
In case you have 1080p monitors, you won’t have to do anything extra here. Just select 1920×1080 for both resolutions, and you will be good to go.
For the FPS values, I personally prefer watching 60 FPS streams, but the downside to smooth streams is that the visuals are going to suffer, things are going to look more pixelated. 30 FPS seems to do the trick for most streams – the footage will be a bit choppy, but the overall quality will be much better.
My microphone settings


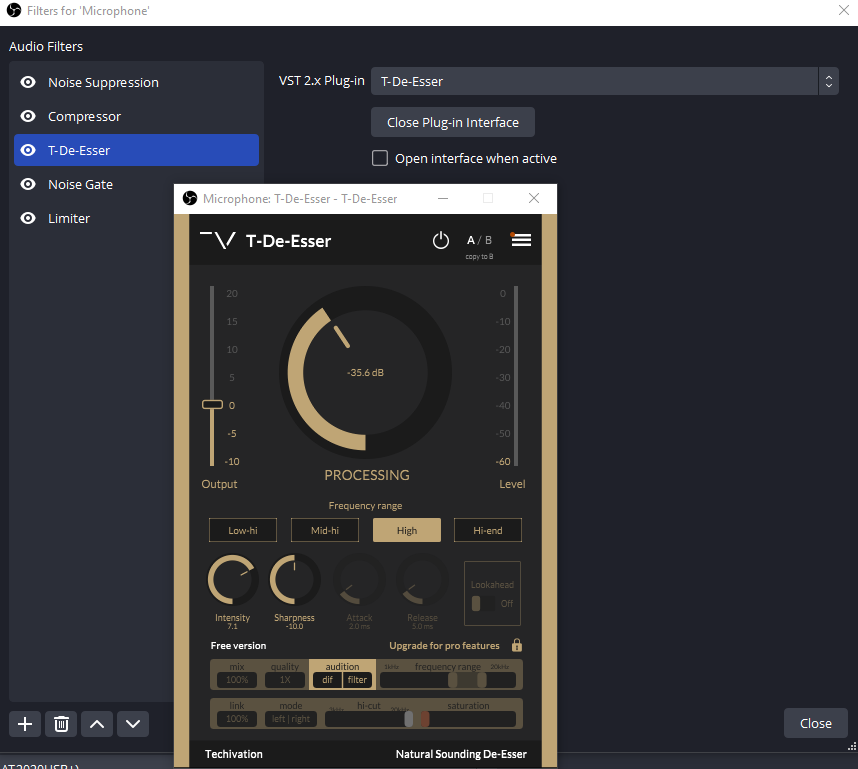

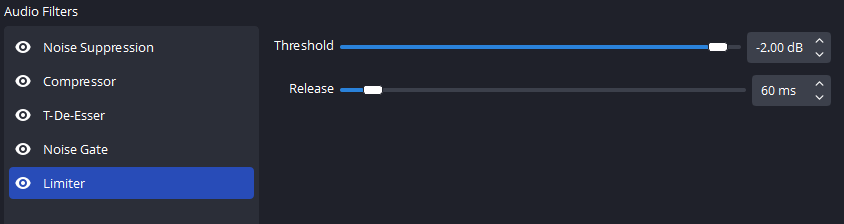
After countless test recordings, this is what I considered to be the best OBS filter settings for the microphone I used to have (Audio-Technica AT2020USB+).
Using these filters is super important for every streamer out there. Cancelling out background noise, as well as making it so people can’t hear your mouse / keyboard will go a long way, and will ensure that you have high-quality audio, no matter what kind of microphone you use.
You might have to tinker with these settings a little, a lot of this will depend on what your voice sounds like, and what sort of microphone you’ve got, but it should be a good place to start.
Also, when I say the “s” sound out loud, it sounds very sharp with the microphone I have, like an aggressive hiss (i.e. it’s sibilant), so to remedy this problem, I installed a plugin called T-De-Esser. If you’re in the same boat as me, this will make your audio sound ten times better.


And these are the settings for my current microphone (Shure SM7B). I use the TC-Helicon GoXLR mixer with it, and these screenshots were taken directly from that audio interface’s software. I only use the Noise Suppression OBS filter with these pre-applied filters, everything else from the screenshots above is disabled.
My ad settings
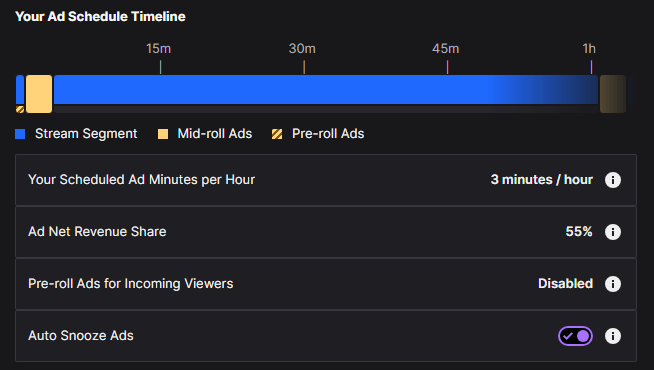
These are, objectively and subjectively speaking, the best settings for your ads. Pre-roll ads would drive potential viewers away, nobody wants to watch an ad before they know what kind of stream they’re going to check out, which is why this option is a better option for established streamers that have a solid viewer base. For new(er) streamers, mid-rolls like these are recommended. 3 minutes per hour ensures that you get 55% of the revenue from the ads (and the remaining 45% goes to Twitch), and this gives you the opportunity to get up and stretch for 3 minutes every hour, which is very important for one’s health.
Guide to emotes
If you’re still in the early stages of your streaming career, or if you don’t know if you’re going to stick around and stream a lot, the best thing to do is to get premade emotes off of Etsy. Figure out a theme that would suit your channel, your personality, and/or your community, and search for that kind of thing. For example: “twitch tabby cat emotes”.
If you have established a viewer base, and you’re ready to spend extra money on custom-made emotes, I recommend checking out Fiverr. Search for “twitch emotes”, and find an artist whose style you like. The artist of my own non-animated emotes is mikucchi, who works very fast and makes high-quality emotes in bulk.
To be continued!
Thank you so much for checking out my guide, may these tips and tricks serve you well, I hope I was able to help you out at least a little! Have a nice day!